Have you been thinking about creating a Facebook page for your practice, but just haven’t gotten around to it yet? Don’t worry, you’re not alone. Many healthcare providers are just getting started on social media and seeing the value of having a Facebook business page.
The good news is setting up your Facebook page is easy, and can help you engage with your patients and attract new ones too. In fact, new patients may be even more likely to find you through Facebook than via your practice website. Plus, Facebook is a great tool to share practice news with patients and get them onboard with new technology.
All you need to get started is a personal Facebook profile, so if you don’t have one, create that first. You don’t have to ever actually use this personal Facebook profile if you don’t want to. It’s just to have as a placeholder for the business page.
Now, follow these nine steps to get your Facebook interactions started.
1. Select a category to Create a Page.
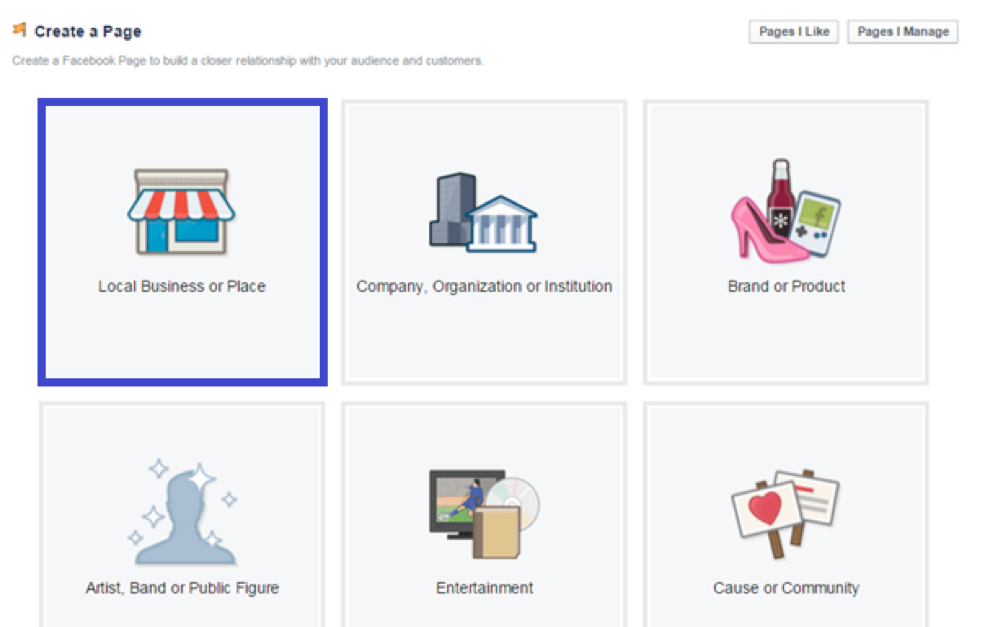
When you visit Facebook’s Create a Page webpage, you will be prompted to select a category for your page. Choose “Local Business or Place.”
2. Enter in basic contact and location information.
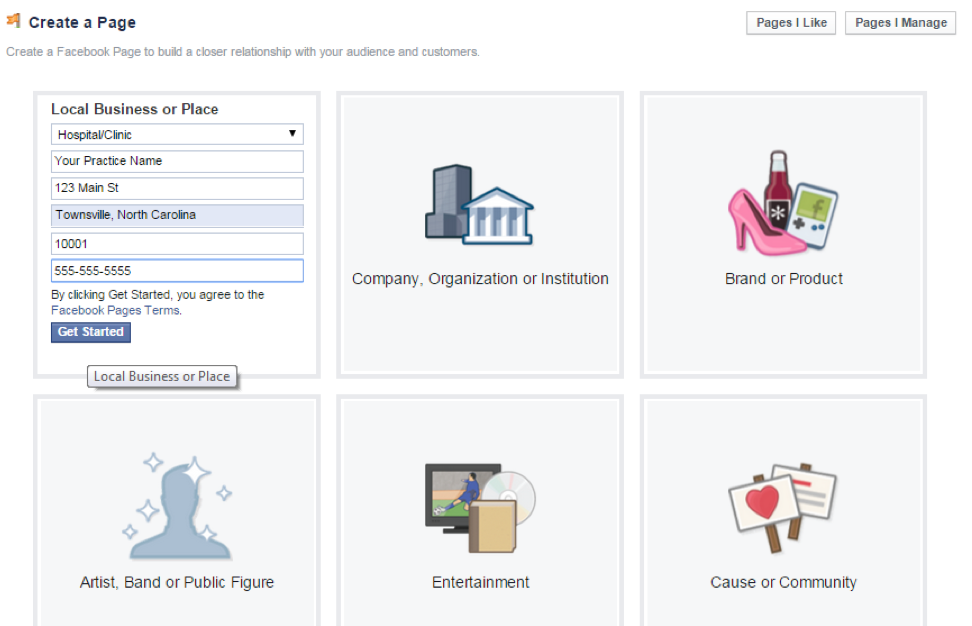
After clicking “Local Business or Place,” fields will appear for you to fill in your basic contact and location information. Select “Hospital/Clinic” from the drop-down menu, and fill out all fields to ensure your patients can find your practice’s information easily.
3. Fill out the About section.
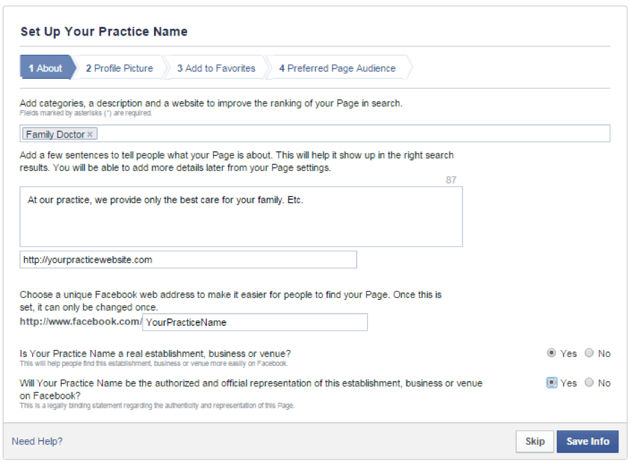
The next page pulls up a series of tabs that will comprise the About section on your Facebook page.
- Category: Begin typing in a category, and the field will automatically populate options as you type. Select the appropriate category for your practice.
- What Your Page Is About: Add a description of your practice that includes keywords you want to rank for in searches (Arizona, dermatologist, top doctor). This will help patients find you when they search for physicians in your field.
- Website: Add the URL for your practice website, if you have one.
- Facebook Web Address: Add an ending to your customizable Facebook web address. Ideally it would be your practice name, but you could also include something with keywords like “familydoctortownsville” if you’re a family doctor practicing in Townsville.
- Answer the two questions at the bottom (yes!), and you’re good to go.
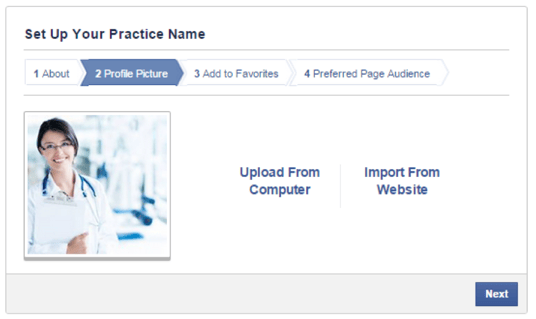
4. Add a profile picture.
This could be your official logo, a photo of your building or inside your office, a photo of you and your staff, or any other image you think best represents your practice. You can either upload the photo from your computer or import the photo from your website. Make sure the photo is eye-catching and appealing to your page visitors.
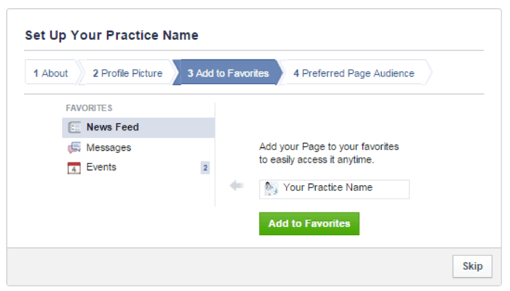
5. Choose whether to Add to Favorites.
This step is more of a personal choice, but you can choose whether you want to add your Facebook page to your personal profile’s Favorites or not. If you choose to add it, your practice’s page will appear on the left sidebar on your personal profile’s Facebook homepage for easy access whenever you want to check it. Click Skip if you don’t want to add the page to your Favorites.
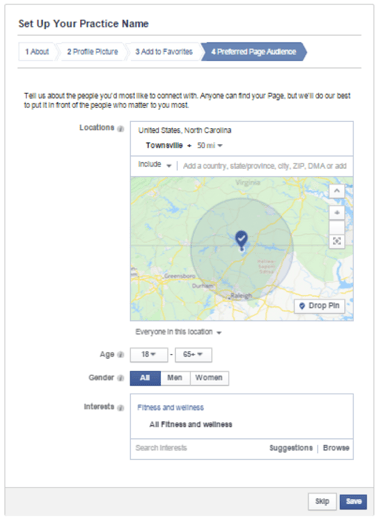
6. Fill out information about your Preferred Page Audience.
This crucial step will help your page appear in front of the targeted demographics of patients you want to attract to your practice.
- Locations: Add the location(s) that you want to target, and select how many miles from your location you want people to find you. From the drop-down menu under the map, select the relationship you want people to have with that location. These include everyone in the location, people who live there, people who recently visited, and people traveling there. You’ll probably want to select everyone or people who live there.
- Age: If you have a targeted age demographic for the patients whom you think you can best serve, enter that age range.
- Gender: If you plan to target a certain gender, such as women for OB-GYNs, select the appropriate gender. If not, leave as All.
- Interests: Click the Interests field, and check the boxes for any interests you believe your target patients might have. For example, you might select “Fitness and wellness” and then more specifically “Obesity awareness” depending on the patient demographic you are appealing to. The more specific you can be, the more targeted your audience will be, which can help you be sure you’re targeting people who will actually need your services. That way, you don’t get as lost in the Facebook fray.
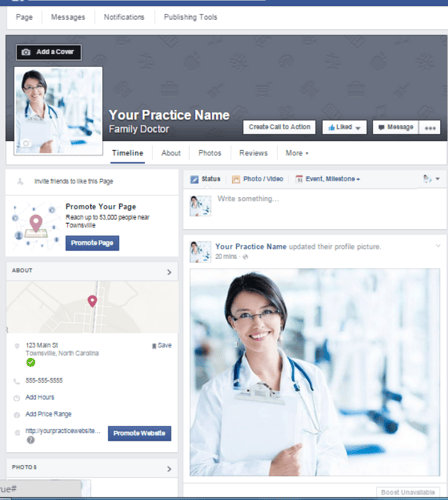
7. Your basic page is all set!
Once you’re done, your basic Facebook page will look something like this:
Now let’s flesh the page out a bit.
8. Add content to your page.
You have several options for fleshing out your Facebook page. While none of these things required, they’ll help make your profile more engaging and informative. re just a good idea to add!
- Add a cover photo.
- Add your hours of operation.
- Add a price range for your services.
- Write your first post! Welcome visitors to your page, introduce yourself, or share some great content right off the bat.
Simply click the button, hyperlink, or field labeled as any of these features to add content.
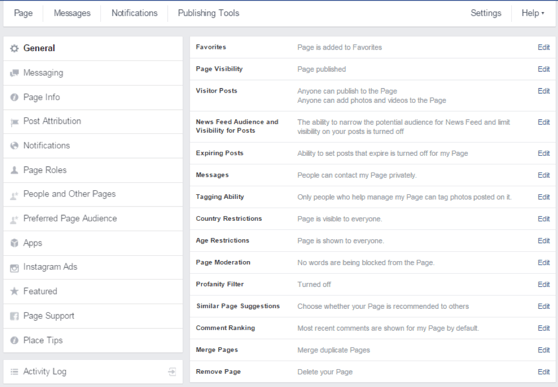
9. Adjust your settings.
You may want to adjust some of the settings on your page depending on how you’re going to use it. For example, you can set up what types of notifications you want to receive, or you can assign other people “roles,” which gives them permission to update the page. (This works great if you have another staff member who you’d like to manage social media.)
You have a number of settings to choose from, so click Settings in the top right corner of your page, and go through each tab individually to customize your Facebook page experience.
That wasn’t so bad, was it? Now that you’ve set up your Facebook page, it’s time to find new patients, engage with current ones, and see what this Facebook hype is all about.


